
[tps_header][/tps_header]
LED ring lights are a valuable tool for photographers. In this tutorial, we are going to build our own!
[ By Alex Udanis at All About Circuits Blog ]
This project uses an RGBW LED ring, a small Arduino-compatible board, and a potentiometer to make a cool and adjustable LED ring light. Depending on your camera, you may need to adjust the size of the filter and LED ring to best suit your needs!
This project is designed for use with a lens that uses a 52mm filter. This is a relatively simple project that can be completed with just a hot glue gun and a soldering iron. I used a ShapeOko CNC router to machine an adapter ring to attach the LEDs to the filter, but this project can be completed without it.
Tools Required

The ShapeOko CNC router used to make the adapter ring
A few tools are required for this project. A soldering iron is required to connect all of the electronics. A hot glue gun is needed to assemble the components and provide stress relief to the wires. Flexible glue, such as Shoe Goo or E9000, can be used in place of the hot glue. Also, I used a ShapeOko CNC router to machine out the 52mm to LED ring adapter, but that is not required.
Tip: Caution should be used with dealing with tools such as soldering irons, hot glue guns, and power tools. Be sure to follow the manufacturer’s safety recommendations.
Schematic
This project is relatively basic. Below is the schematic I made in Fritzing:
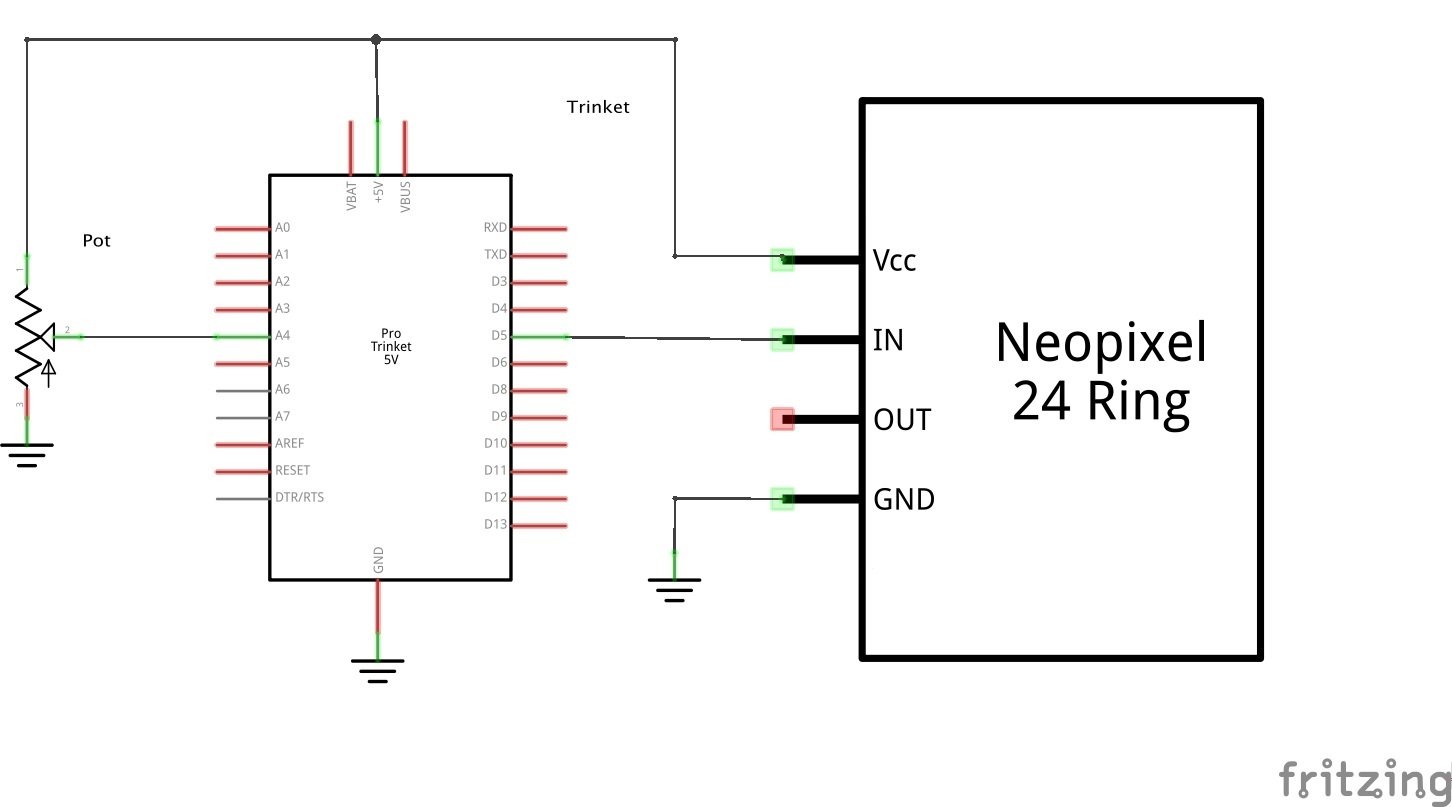
The schematic of the project we are building. Click to enlarge.
The schematic can be seen above. The 10k Ohm potentiometer gets connected to the +5V Bus, Analog 5 (A5), and ground.
The Neopixel ring is attached to the +5V bus, digital pin 5, and ground.


