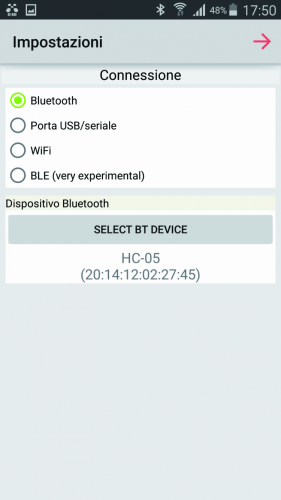
Activation of the wireless telemetry via Bluetooth
It is possible to enable the wireless telemetry by means of a Bluetooth communication, in a simple and fast way, thus allowing the compatibility with PCs, smartphones and tablets. You will need a Bluetooth module of the slave kind, that is enabled for the SPP profile (serial communication) as the HC-05 or HC-06 modules are, or the DAGU module. The essential step is to modify the communication speed, by bringing it to 115 Kb, the assigned name is inconsequential.
The PC on which the MultiWiiConf software will run must have an appropriate integrated Bluetooth module or a dongle, inserted in a USB port, that will be able to connect to the board; given that the communication is in transparent-mode, nothing changes in the software management.
Let’s see now the steps to follow in order to use the Bluetooth module, by referring to the DAGUS model, that is essentially a HC-06 module with Linvor V1.8 firmware. Please use a USB/Serial converter in order to interface the module to the PC; with the wiring as follows: Vcc-Vcc, GND-GND, TX-RX, RX-TX.
Please start a software for the serial communication, such as Termite (free software that does not need an installation) or, in a much simpler way, you may use Arduino IDE. Please open a communication towards the port in which the USB/Serial converter is installed and set a communication speed equal to the module’s default one (usually 9,600 bps); in the transmission, please disable the addition of the carriage return and of a new line (CR and LF). Please send the AT command and wait for the OK reply in order to verify that the module correctly replies; if it wasn’t like that, try to set other communication speeds and repeat the sending of the AT command. Once the connection has been established, please give the AT+VERSION command, in order to visualize the firmware version installed.
You may modify the device name by means of the AT+NAMEmyname command and finally, please modify the communication speed by means of the AT+BAUD8 command; at each command you will receive a confirmation reply. The abovesaid settings may be carried out only with a disconnected module.
The red LED is turned on along with the powered module, while the blue LED flashes while waiting for a connection; it remains with a fixed light when the module is connected and ready for the transmission. From the remote device it is necessary that you execute the association with the Bluetooth device: the password to be typed in, when required, is 1234.
If you are using the BT HC-05 module, FC-114 version, you will have to proceed in a slightly different way: please connect the module to the PC via a USB/serial that works at 3.3 volts and manage the communication by means of any software for the serial monitoring, and pay attention to set the mode for sending commands, with the addition of the carriage return and of a new line (CR and LF).
Please enable the module’s AT command mode and send the AT string so to verify that the communication is ok; you may use the AT+VERSION command in order to verify the installed firmware version. We are interested in modifying the communication speed, by bringing it to the value of 115,200 bauds, which is obtained by sending the AT+UART=115200,0,0 command (the name of the device is inconsequential).
On the flight board, two connectors that may be used for the telemetry are available; both are connected to the microcontroller’s UART3 module. The connector marked as UART3-5V is suitable for telemetry systems operating at 5V, such as DAGU’s Bluetooth module, while the connector marked as UART3-3V3 is suitable for circuits operating at 3.3V, such as the HC-05 Bluetooth module.
As an alternative, on the board there is a socket on which it is possible to directly weld the HC-05 module. The HC1RX and HC1TX jumpers must be placed towards contact 3 (UART3).


