Lucas from Soldernerd has this interface designed for his MPPT Solar charger. You can read his original article here. Below is the article reproduced.
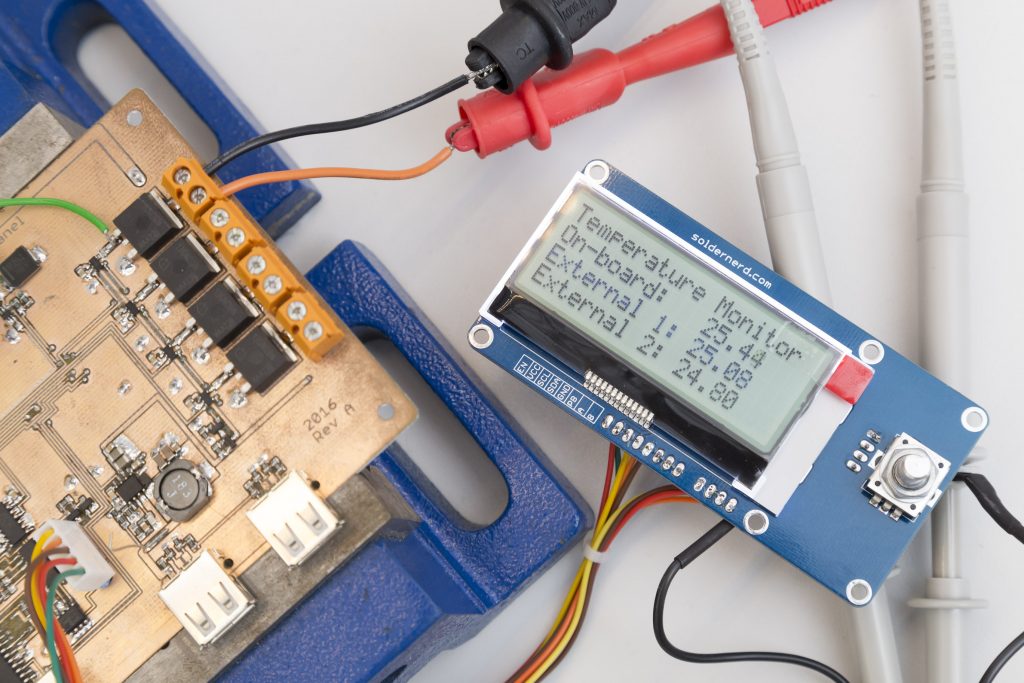
As you may have noticed I’m quite busy working on the MPPT Solar Charger project. The latest version uses a 4 lines x 20 characters LCD that connects via I2C as well as a rotary encoder with a push button.
While the display got its own little board, the encoder connected directly with the solar charger where its signals aredebounced in hardware and then routed to the PIC.
After a few little fixes (see my last post) that worked but I had to use the signal intended for controlling the backlight brightness for the display’s reset signal. I don’t want to run any more wires to the display and there are no spare pins on the PIC anyway so I had to come up with another solution.
And it was not very elegant that the display was powered off by just cutting the entire power supply. Having a digital enable/disable signal would be preferable
Design a universal User Interface
I then decided to design an new board that also includes the rotary encoder with all the necessary debouncing. That way I get a quite universal, easy to use user interface that I can use for other projects as well. That eliminates the need to design the same functionality (think debouncing) again and again. The size of the board is mainly given by the size of the display so there is plenty of board space.
So far so good but that doesn’t solve the actual problems yet. I still need a way to control both the backight as well as the reset signal without needing any more singnals. Since the display connects via I2C it was quite straight forward to use I2C communication for those purposes as well. My first thought was to add a I2C port expander just like I’ve done on the solar charger board. Those chips aren’t expensive but they typically provide 8 or 16 extra GPIO pins which seemed a bit wasteful. And PWM control of the backlight would require a great deal of I2C communication which puts a burdon on the microcontroller.
I also considered adding a sub-dollar PIC16 which could be programmed as an I2C slave and control both the backlight and the reset signal (as well as giving the option of getting the encoder input via I2C). But I wasn’t eager to write any software for this thing.
Requirement: Ultra Low Power State
Another design requirement was to keep this a very low-power design. To be sure: when the display and especially the backlight are on it will consume several milliamps to several dozen milliamps. Illumination doesn’t work without power, such is life. But when the user interface is not in use, we need a way to put it in a very low power state where the display as well as the rotary encoder is off but the push button still works in order to wake up the microcontroller. In that state the user interface must not use more than a few microamps. Furthermore the encoder signals must assume a high impedance state when the user interface is disabled.
My final solution was as follows:
- Use the previous (backlight) PWM signal as an enable signal. Power can now always stay on. When the enable signal is high, the display is on, when enable is low, the user interface goes into its low-power state.
- Add a dual I2C digipot to control both the reset signal as well as the backlight.
The reset signal is connected directly to the wiper of one of the two digipots. Of course any intermediate digipot values don’t make sense. The digipot should always be either at its minimum or its maximum.
The backlight brightness is controlled by the other digipot via an op-amp and a n-channel mosfet.
The debouncing is basically unchanged. Like in the solar charger design, a 74HC126 quad tri-state buffer is used together with some resistors and capacitors.
Since there are 4 gates on the 74HC126 and I only need to debounce 3 signals, there is still one gate left. I used that gate to power the display as well as the encoder and the encoder’s gates(without the push button which is always powered on). So the enable signal only controls the input of that gate. I thought that’s a nice and elegant solution. Well, if you think so too, think again. More on that later.
Testing
First of all nothing worked at all. I asserted the enable signal and nothing happened. Nothing was powered on. The error was soon found. I made a design error with the result that the respective gate was permanently in a high-impedance state. Somehow I had tied the gate’s enable input to ground instead of VCC. The mistake was corrected by cutting the ground connection and conecting the respective pin to the enable singal itself which was available from the pin right next to it. Not pretty (see below) but problem solved.
Then ok, power was there but when I tried to turn off the reset singal (i.e. pulling the reset signal high) nothing happened – again. Again, the reason was simple. The digipot’s upper terminal was floating instead of being connected to VCC. On the schematic the wire touched the respective pin but there was no connection. While that was really hard to notice on the schematic I should have noticed the problem when I laid out the board. There was obviously no connection to that pin.
This was a bit harder to fix than the previous error. There were no signals to cut but the digipot’s pins are much more closely spaced and the right signal was not to be found nearby. I ended up soldering a thin wire accross the digipot to a resistor that is connected to VCC on the upper end.
Even less pretty but problem solved anyway. Turning on the backlight basically worked as intended but the load was a bit much for the 74HC126. While it can supply up to 35mA according to the data sheet, its output voltage is nowhere near its positive supply rail when it supplies that much current. Even with a more modest 5mA load the gate’s output voltage was about half a volt below the input voltage. As a result, the display as well as all the other components only get to see about 2.8 volts instead of 3.3. This didn’t pose any problems so far but it’s not nice.
Another issue I noticed was that the LM321 op amp I had chosen is not a rail-to-rail op amp. The LM321 is inexpensive and I had quite a few left from another project so I used it without giving it much thought. I measured that the output voltage doesn’t get closer than about 1.4 volts of the positive supply rail. Since the n-mosfet used to control the backlight has a very low threshold voltage that didn’t pose a problem but the LM321 is not really a good choice here. While it does work from as little as 3 volts it’s made for split supply and higher voltages, say plus/minus 12 volts. I’ll use a low-voltage rail-to-rail type next time.
Software
Getting any MIDAS I2C display to work is a nightmare. They make nice, pretty and affordable displays. That’s why I buy them. And once you’ve managed to properly initialize them they are easy to work with. But getting them initialized with the right settings is always a lengthy trial-and-error process. I’ve ranted about that before but I feel the need to do it once again.
The entire initialization sequence needs to be written in one single I2C transmission. At least for me it didn’t work otherwise. The data sheet says absolutely nothing about that.
The data sheet doesn’t even mention the initialization sequence. Nor the timing of the reset singnal. The reset signal needs to be pulled low for 10ms. One then needs to wait for 5ms before the initialization sequence is sent. There is not one word about that it in the current datasheet. There is an older version in the net somewhere that mentions those timing issues and at least gives a sample initialization sequence.There are various contrast settings that must be set properly via I2C commands but there is very little information on those commands in the data sheet. I wrote an email to their customer support asking if there is a list of commands the display supports. That was more than a month ago and I still didn’t get any answer. As so often, google was my friend and others have faced similar problems before so I managed to find some commands that make the display work properly. I’m sending 10 or so bytes to the display but for most of them I have not a clue what they actually mean or what they are supposed to do. And the commands for this black-on-white display are different to the (otherwise identical) white-on-blue display. Have fun…
Debouncing
I’ve devoted one of my very first posts to the much-neglected issue of debouncing. The logic is pretty much the same here except that I use different (non-inverting) gates here. The reason for that is the need for 3-state outputs as mentioned before.
Unfortunately the 74HC126 doesn’t have schmitt-triggered inputs so I need to implement the necessary feedback myself via the 680k resistors.
Debouncing something like a pushbutton is quite easy. Just use a relatively long time constant (i.e. large resistors and capacitors) and all will be fine. That will introduce some delay in the output signal but as a rule of thumb anything below 50ms is not noticable. And a time constant of a few milliseconds is totally sufficient so you might end up with something like 10ms of delay. No human user will ever notice it and it’s more than enough to perfectly debounce any switch that I’ve seen.
With rotary encoders things get much trickier. The basic circuit is exactly the same but choosing the right component values is more difficult. You can’t press a button more than a few times a second but a rotary encoder might produce pulses just milliseconds or even less apart.
So you face the challenge of debouncing the signal while still letting relatively fast transitions pass. If you use a time constant of a few milliseconds like with the push button you will not be able to detect when the encoder is turned quickly.
The data sheet of the Burns encoder I’m using here recommends using two 10k resistors together with a 10nF cap. I’ve increased the value of one resistor to 22k but have otherwise followed that recommendation. So the time constant is now a few hunderd microseconds.
Toghether with the positive feedback via the 680k resistors that works very well. I expected to tweak those values a bit but found that they work so well that I just leave them as they are.
I’ve inserted plenty of scope screenshots here to give you an idea of what the undebounced and debounced signals look like. Even with the same encoder there’s plenty of variation as you can see. But with the hardware debouncing applied here we get a clean, digital output singal nevertheless.
Power consumption
Very low standby power consumption was one of the key design goals. When in low-power mode only the push button pull-up and the 74HC126 is supplied with power. Everything else, the display, the op-amp, the digipot and the pull-up for the rotary encoder are all completely powered off.
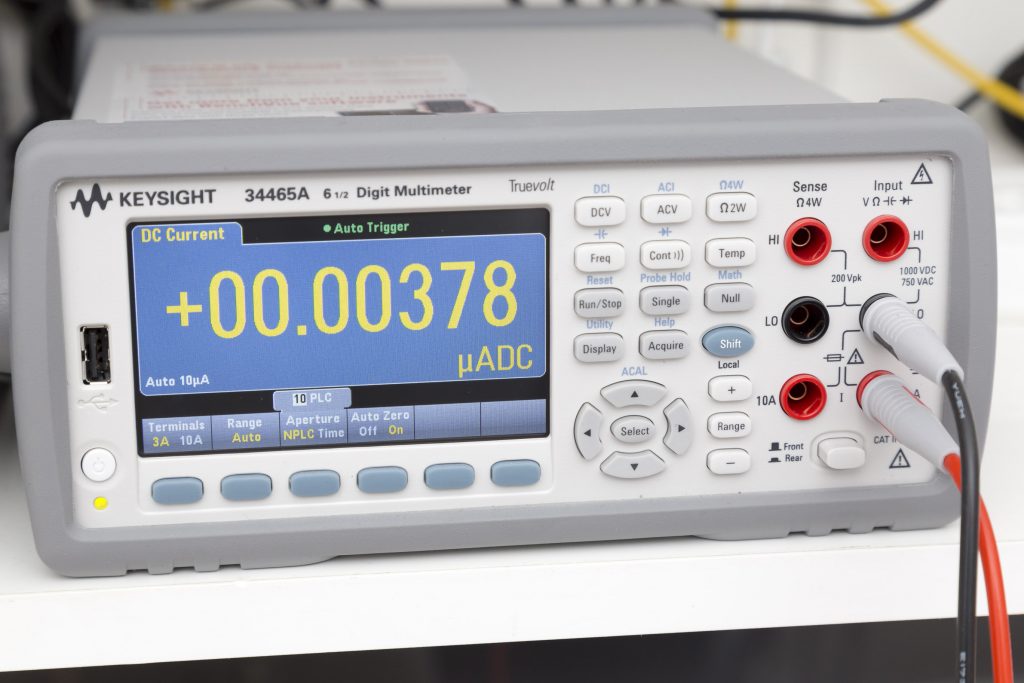
As long as the push button is not pressed, no power flows there so the only power consuming device is the 74HC126. Its datasheet specifies a maximum static current consumption of 8 microamps (worst) at room temperature. There’s no typical figure so that’s all the information I had. When I measured it, this is what I got.
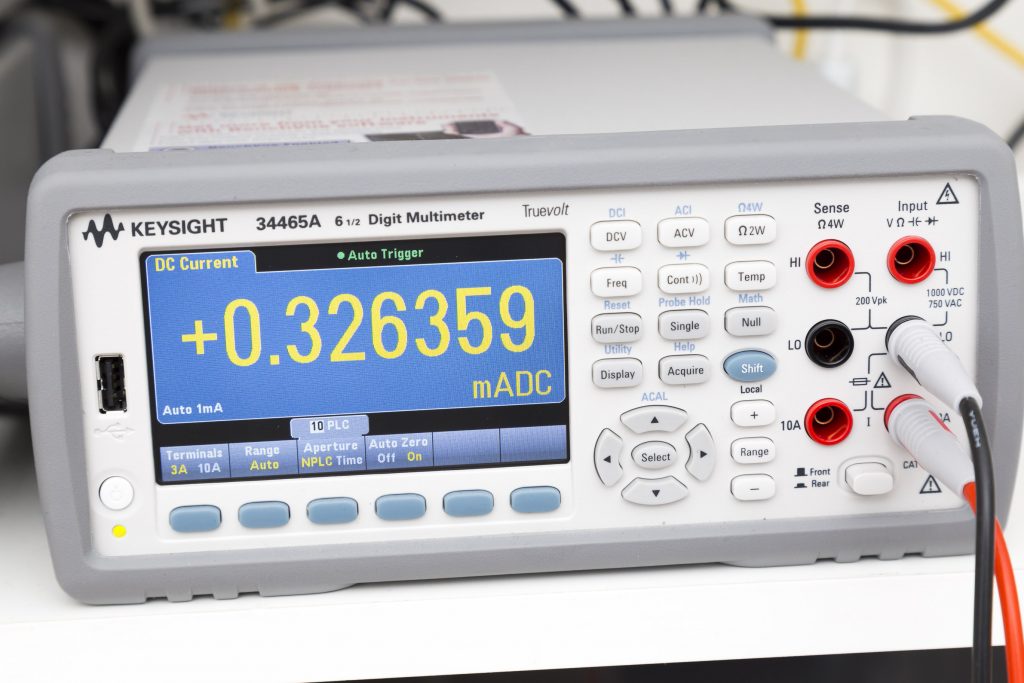
That’s 4 nanoamps at 3.3 volts which is nothing really. Actually the measurement fluctuated between about 0 and 15 nanoamps. I thought something is not hooked up correctly but when I pushed the button the current jumped to 326 microamps which is just what I expected since there is a 10k pull-up resistor conected to that button.
So the measurement works and it seems that the 8 microamps given in the data sheet are just a very conservative worst case. I mean CMOS is close to zero-power when static and only a single tri-state gate is active so essentially no current flows. Cool.
Next steps
After the two hardware fixes this user interface works quite as intended. Using the spare gate to supply the rest of the circuit with power was not as good an idea than I thought. On the positive side the debouncing works just perfect with the chosen component values. And as mentioned, the op-amp was not a great choice for the job at hand.
But I like the look and feel of this universal user interface and think the overall concept is good. So there will be a Rev B of this board with those issues solved.
Here you find the eagle files as well as PDFs of the schematic and board. The two errors are already corrected but I haven’t actually built them so check carefully yourself. I’ve also re-exported the gerbers so they, too, already include the fix.


